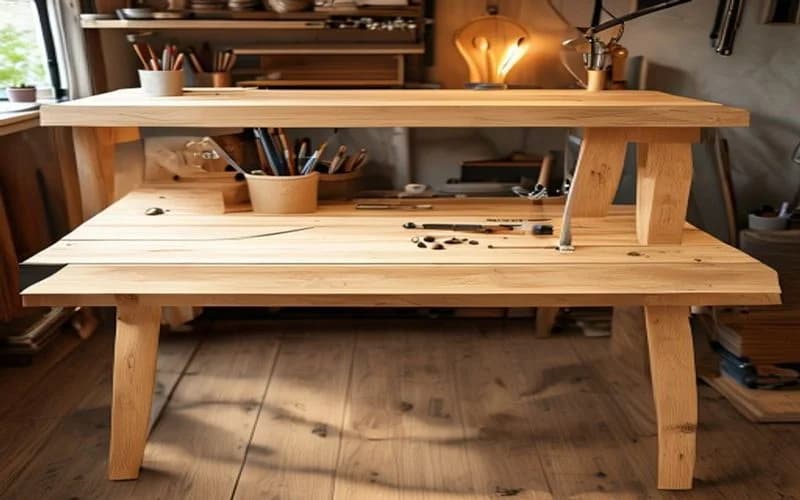
How to Build a DIY Standing Desk with Plywood (Step-by-Step)
Build a motorized standing desk with a Baltic Birch plywood top for under $400. Includes cut list, finish schedule, and frame kit recommendations.
Giang Nguyen
Wood Manufacturing Expert
Why Baltic Birch Plywood Is the Best DIY Desk Material
When you look at a $799 [Uplift V2](/reviews/uplift-v2-solid-wood), about $250–$350 of that cost is the desktop itself. The frame, motor, and electronics account for the rest. By building your own desktop from [Baltic Birch plywood](/plywood) and pairing it with a standalone motorized frame, you can build a desk that *matches or exceeds* commercial quality for $350–$450 total.
Why Baltic Birch specifically?
| Property | Baltic Birch | Red Oak Plywood | MDF | Poplar Plywood |
|---|---|---|---|---|
| Density | 680 kg/m³ | 660 kg/m³ | 700 kg/m³ | 450 kg/m³ |
| Void-free core | ✅ Yes | ❌ No | N/A (no plies) | ❌ Occasional |
| Edge appearance | Beautiful multi-ply | Needs edge banding | Requires banding | Acceptable |
| Screw holding | Excellent (all plies birch) | Good (face only) | Poor | Fair |
| Moisture resistance | Moderate | Moderate | Very Poor | Moderate |
| Cost (3/4" × 4' × 8') | $85–$110 | $65–$85 | $35–$50 | $55–$70 |
Baltic Birch's void-free core is its killer feature for desks. Every ply is solid birch (typically 13 plies in 3/4" stock), which means exposed edges look *intentionally beautiful* — those distinctive stripes are a design feature. No edge banding required. For a deep dive into plywood species and grades, see our [plywood material guide](/plywood).
Materials List
Desktop
- 1 sheet Baltic Birch plywood, 3/4" (18mm) × 5' × 5' — $95–$110
- Note: Baltic Birch comes in 5' × 5' sheets, not 4' × 8'. Plan your cuts accordingly.
- For a 60" × 30" desk, you'll need a 5' × 5' sheet (you'll have a 30" × 60" offcut — perfect for a shelf)
- Alternative: 2 sheets of 3/4" × 4' × 8' [Poplar plywood](/plywood) if you plan to paint — $55–$70 each
Frame Kit
- Option A — Best Value: FlexiSpot E7 frame only ($379) — dual motor, 275 lb capacity, 22.8"–48.4" range
- Option B — Budget: FEZIBO dual motor frame ($199) — 220 lb capacity, 27.2"–46.5" range
- Option C — Premium: Uplift V2 Commercial frame only ($599) — 355 lb capacity, 3-stage legs, best stability
Finish Materials
- Hardwax oil (Rubio Monocoat): $48 for 100ml (covers 55 sq ft) — single-coat, food safe, matte finish
- OR water-based polyurethane (Varathane): $18/qt — 3 coats needed, more traditional gloss
- 220-grit sandpaper: $8 for a 5-pack
- 320-grit sandpaper: $8 for a 5-pack (inter-coat sanding)
- Tack cloth: $4
- Wood conditioner (if staining): $12
Hardware
- Threaded inserts (1/4"-20): $12 for 25-pack — far superior to driving screws directly into plywood
- Machine bolts (1/4"-20 × 5/8"): $6 for a 25-pack — match the inserts
- Rubber grommets (2" diameter): $8 for 2-pack — cable pass-throughs
Total estimated cost: $350–$450 (vs. $599–$899 for comparable commercial desk)
Tools Required
- Circular saw with 60-tooth blade (or table saw)
- Drill/driver
- Random orbital sander (or sand by hand — it'll just take longer)
- Clamps (at least 2 × 36")
- Straightedge/T-square for cuts
- 2" hole saw (for grommet holes)
Step 1: Cut the Desktop (20 Minutes)
Dimensions: We recommend 60" × 30" for a single-monitor setup or 72" × 30" for dual monitors. These are the same dimensions as the [Jarvis Bamboo](/reviews/jarvis-bamboo) (60" × 30") and Uplift V2 (72" × 30") respectively.
- Mark your cut lines on the good face of the plywood using a straightedge
- Score the cut line lightly with a utility knife — this prevents tear-out on the face veneer
- Set circular saw depth to 7/8" (just past the 3/4" material thickness)
- Cut with the good face down if using a circular saw (blade teeth cut upward)
- Cut with the good face up if using a table saw
Critical: Use a 60-tooth (or higher) crosscut blade. A standard 24-tooth framing blade will shred the birch veneer.
Step 2: Shape the Edges (15 Minutes)
You have three options for the front edge where your forearms rest:
- Option A — Rounded (recommended): Use a 1/4" roundover router bit on the top and bottom edges. This removes the sharp corner and is most comfortable for forearm contact
- Option B — Chamfered: 45° chamfer at 1/8" depth. More modern/industrial look
- Option C — Raw: Just sand the edges smooth with 220-grit. The exposed birch plies look great as-is
Step 3: Drill Cable Management Holes (10 Minutes)
- Mark grommet positions: one at 12" from the right edge, 2" from the back edge; one at 12" from the left edge, 2" from the back edge
- Drill with 2" hole saw from the good face, with a sacrificial board underneath to prevent blow-out
- Sand the hole edges with 150-grit wrapped around a dowel
- Insert rubber grommets — press-fit, no adhesive needed
Step 4: Sand the Surface (30 Minutes)
Sanding is where cheap desks diverge from great ones. Don't skip grits.
- Start with 120-grit to remove any mill marks or handling damage
- Progress to 150-grit — this is your shaping grit
- Finish with 220-grit — this is your finish-prep grit
- For Rubio Monocoat: stop at 220. The oil needs tooth to bond.
- For polyurethane: you can go to 320 for an ultra-smooth base
Always sand with the grain. On Baltic Birch, the face grain runs lengthwise. Sand in long, even strokes. Wipe with a tack cloth between grits.
Step 5: Apply the Finish (2 Hours Active, 24–72 Hours Cure)
Option A: Rubio Monocoat (Recommended)
Rubio Monocoat is a plant-based hardwax oil that bonds molecularly with wood fibers. One coat. No re-coating. 0% VOC.
- Mix Part A and Part B in a 3:1 ratio (per manufacturer instructions)
- Apply a thin layer with a white Scotch-Brite pad, working in 12" × 12" sections
- After 3–5 minutes, buff off all excess with clean cotton rags — this step is critical. Excess oil will not cure and will stay tacky.
- Cure time: 24 hours to light use, 5 days to full hardness
Result: A matte, natural-looking finish that highlights the birch grain. Spill-resistant but not waterproof — wipe up liquids within 15 minutes.
Option B: Water-Based Polyurethane
- Apply thin first coat with a foam brush or microfiber applicator
- Dry 2 hours, then sand lightly with 320-grit
- Tack cloth, apply second coat
- Dry 2 hours, sand 320
- Apply third (final) coat — do not sand
- Full cure: 72 hours
Result: A satin-to-gloss protective film. More water-resistant than oil. Shows brush strokes if you're not careful.
Step 6: Install Threaded Inserts (20 Minutes)
Do not screw the frame directly into plywood. Threaded inserts provide a metal-to-metal connection that can be disassembled and reassembled without stripping.
- Flip the desktop upside down on a soft surface (moving blanket)
- Position the frame on the underside, centered, and mark bolt holes with a pencil
- Drill pilot holes for each insert: 5/16" diameter for 1/4"-20 inserts, 3/8" deep
- Drive inserts using a bolt + two jam-nuts as a driving tool (not a screwdriver — that strips the insert)
- Thread machine bolts through the frame brackets and into the inserts
- Torque to snug + 1/4 turn — do not overtighten
Step 7: Mount the Frame and Test (15 Minutes)
- Bolt the desktop to the frame at all mounting points
- Flip the desk upright (get a friend — it'll weigh 55–70 lbs total)
- Plug in the motor and control box
- Run the desk through its full range: bottom → top → bottom
- Listen for any rubbing, clicking, or cable tension
- Program your sitting and standing heights into the memory presets
Cost Comparison: DIY vs. Commercial
| Component | DIY Cost | Equivalent Commercial |
|---|---|---|
| Baltic Birch desktop (60" × 30") | $95–$110 | Included in desk price |
| Finish materials | $50–$65 | Included |
| Frame kit (FlexiSpot E7) | $379 | $599 (Uplift V2 full desk) |
| Hardware | $26 | Included |
| **Total** | **$350–$450** | **$599–$899** |
You save $200–$450 and get a desktop material (Baltic Birch) that's arguably better than the rubberwood, bamboo, or MDF tops found on most commercial desks.
Upgrades and Variations
- Live edge: Use a 2" thick birch slab from a lumber yard ($150–$300) instead of plywood for a live-edge standing desk
- Walnut veneer: Apply iron-on walnut edge banding ($12/25ft roll) for a premium edge look
- Dual-layer: Laminate two 1/2" Baltic Birch sheets with wood glue for a 1" thick top with 18+ visible plies at the edge
- [Phenolic Film Faced plywood](/plywood): Use phenolic-coated plywood for a completely waterproof, ultra-durable surface — great for workshop/lab standing desks
For more on choosing the right plywood for your project, see our comprehensive [plywood comparison guide](/plywood) and our breakdown of [MDF vs Plywood vs Particle Board](/guides/mdf-vs-plywood-vs-particle-board).
Want to see our testing in action?
Browse our expert-tested standing desk reviews with real lab data.
Explore Reviews